
TL;DR
Candle tunneling occurs when a candle burns down the center, wasting wax and shortening lifespan. It’s usually caused by improper burning habits or wick issues, but can be fixed and prevented with simple care tips.
Why Your Candle Tunnels and What It Is Trying to Tell You
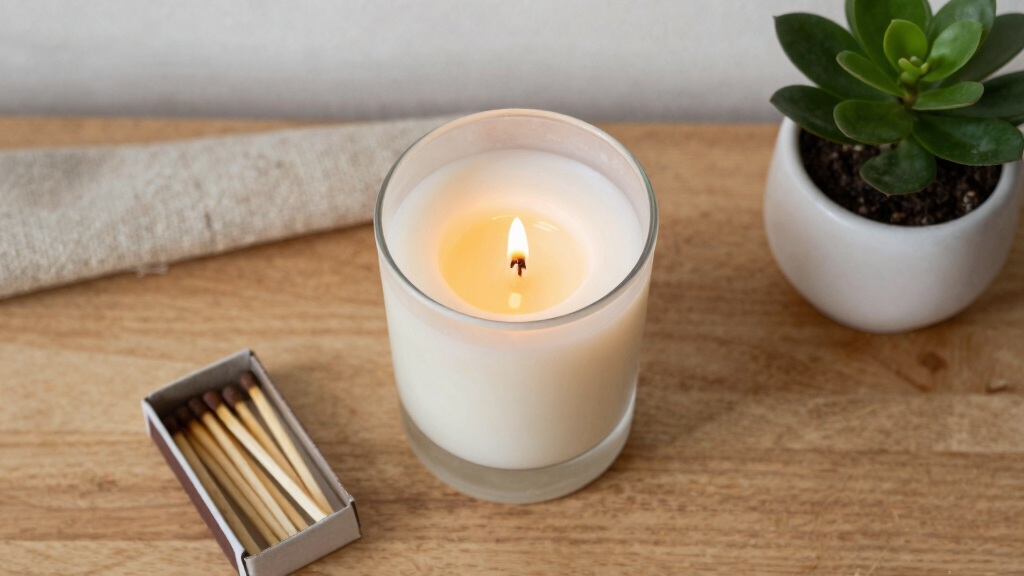
Candle tunneling happens when the flame burns a deep channel down the center while the outer wax stays solid. The message is practical: the melt pool is too small, the wick may be mismatched, or the candle needs a longer, steadier burn.
“A tunnel is not a ruined candle. It is a burn pattern asking for correction.”
Core ideaLet the wax pool reach the container edge before extinguishing.
A tidy wick helps distribute heat without soot or mushrooming.
Solid wax remains around the edge while the center drops lower.
Burn sessions that end before a full melt pool forms.
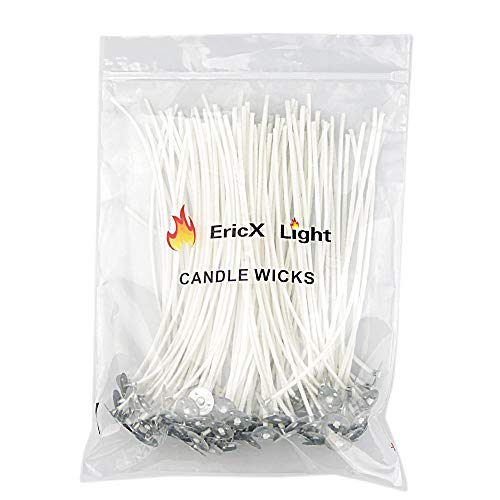
A wick that is too small may not create enough heat.
Warm the edges gently, level the surface, then burn patiently.
The candle is mapping its heat problem.
Tunneling is more than a visual annoyance. It wastes usable wax, shortens the candle’s lifespan, and can eventually drown the wick beneath a pool of melted wax in a narrow center channel.
The first burn ended too soon.
Wax has a memory. If the first melt pool stops before reaching the edge, future burns tend to follow that smaller circle.
The wick cannot heat the full surface.
A wick that is undersized for the jar diameter melts the center but leaves the outer wax cool and untouched.
The room is fighting the flame.
Drafts, cool surfaces, and temperature swings can disturb the flame and prevent a stable, even melt pool.

CHEFBEE Candle Wick Trimmer, Black Polished Stainless Steel Wick Clipper Cutter, Scissors, Reaches Deep Into Candles to Cut Spent Cord, Allow Cleaner Burn and Prevent Soot Buildup
Ideal Size for Deep Candles:Measuring approximately 18 x 6 x 2 cm (7.28 x 2.26 x 0.88 inches),…
As an affiliate, we earn on qualifying purchases.
As an affiliate, we earn on qualifying purchases.
Set the melt pattern before the tunnel sets itself.
Every clean burn builds on the last one. The goal is simple: keep the wick trimmed, give the candle enough time, and let the full top layer liquefy whenever possible.
Trim
Cut the wick to about 1/4 inch before lighting so the flame stays controlled.
Place
Keep the candle away from drafts, cold windows, fans, and uneven surfaces.
Pool
Burn until the melted wax reaches the edge, especially on the first use.
Repeat
Future burns should respect the same surface-wide melt pattern.
EricX Light 100 Piece Natural Candle Wick, Low Smoke 6" Pre-Waxed & 100% Natural Cotton Core,For Candle Making,Candle DIY
Pre-waxed and tabbed
As an affiliate, we earn on qualifying purchases.
As an affiliate, we earn on qualifying purchases.
What raises the chance of tunneling?
The highest-risk conditions are the ones that keep heat concentrated in the middle. A short first burn and a weak wick are the strongest warning signs.
Burn-time spectrum
A 30-minute burn often melts only the center. A longer first session gives the candle a wider wax memory and protects the edge from becoming a permanent wall.

2 PCS Candle Lighter,Windproof Flameless Electric Lighter with LED Power Display & Safety Switch, Upgraded Plasma USB Rechargeable Lighters for Birthday Camping BBQ (Champagne Gold)
[Safety Is Our Primary Responsibility] – The candle lighter use automatic power-off technology, which will automatically shut down…
As an affiliate, we earn on qualifying purchases.
As an affiliate, we earn on qualifying purchases.
Read the candle before replacing it.
Use the burn pattern to diagnose what went wrong and choose the least aggressive correction first.
| Signal | What it suggests | Quick fix | Prevents waste? | Future risk |
|---|---|---|---|---|
| Wax ring after first use | First burn was not long enough | Burn longer next time if the tunnel is shallow | ✓ Yes | ~ Medium |
| Deep center hole | Tunnel pattern is established | Warm the outer wax gently and level the surface | ✓ Yes | ~ Medium |
| Wick sinks or will not stay lit | Melted wax is drowning the wick | Remove excess softened wax carefully | ~ Partial | ✗ High |
| Edges never melt | Wick may be too small for the jar | Choose a better wick-to-container design next time | ~ Partial | ✗ High |
| Soot or mushrooming | Wick is too long or burning unevenly | Trim to 1/4 inch before relighting | ✓ Yes | ~ Medium |
Green means the action usually helps preserve burn quality. Amber means it may help but depends on how deep the tunnel has become. Red means the candle may need more intervention or better design next time.

RONXS 3 in 1 Candle Accessory Set, Candle Wick Trimmer Cutter, Candle Snuffer Extinguisher, Wick Dipper with Gift Package for Candle Lover (Black)
Candle Accessory Set – Trim candle wick to prevent soot and also add to candle burn time; Snuff…
As an affiliate, we earn on qualifying purchases.
As an affiliate, we earn on qualifying purchases.
From tiny habit to longer glow.
The path is connected: care choices shape the melt pool, the melt pool shapes wax use, and wax use determines how long the candle keeps performing beautifully.
Trim
Steady flame, less soot.
Full pool
Edges join the burn.
Even wax
No center-only channel.
Clear wick
Less drowning risk.
Longer life
More usable fragrance time.
The candle is asking for patience, not perfection.
Tunneling is usually fixable when caught early. Warm the edges, restore a level surface, trim the wick, and give the next burn enough time to reach the jar wall. Future candles benefit from the same ritual: right wick, right placement, full melt pool.
Frequently asked questions.
Most tunneling questions come down to the same three variables: time, wick size, and heat distribution.
Why does it tunnel even when I follow instructions?
The wick may be mismatched, the first burn may have stopped too early, or the jar shape may trap heat in the center.
How can I fix a tunneled candle?
Gently warm the outer wax with a hairdryer or controlled heat source, then let the surface reset evenly before the next burn.
Is tunneling harmful?
It is mainly a performance issue, but it wastes wax, shortens lifespan, and can make the wick harder to keep lit.
Which candles are less prone to it?
Soy and beeswax candles with well-designed wicks tend to burn more evenly when they are placed and burned properly.
What Is Candle Tunneling, and Why Should You Care?
Candle tunneling happens when your candle burns a deep, narrow hole down the center, leaving wax untouched around the edges. Imagine a candle in your favorite jar, melting only in the middle, while the sides stay solid. This isn’t just an aesthetic issue; it wastes wax, shortens your candle’s lifespan, and can even drown the wick if the tunnel gets too deep.
For example, if you burn a candle for just 30 minutes, it might not melt to the edges. Over time, you’ll notice the middle melts away, but the wax around stays untouched. That’s tunneling in action. It’s like the wax is stubbornly refusing to melt evenly, and it’s a sign you’re not burning it correctly.
This uneven melting not only wastes wax but also impacts how long your candle lasts. When wax isn’t used efficiently, you need to buy replacements more often, costing you money. Plus, tunneling can cause the wick to drown in accumulated wax, making it harder to keep the candle lit. Recognizing and addressing tunneling is essential because it directly affects the value and enjoyment of your candles. Properly understanding it helps you make smarter choices in candle selection and burning habits, ultimately giving you a better, more sustainable candle experience.
Why Does My Candle Tunnel Even When I Follow the Rules?
Even if you’re careful, candles can tunnel for a few reasons. The most common? The wick size isn’t right — too small, and it won’t produce enough heat to melt the wax evenly. Or, you’re not burning the candle long enough during each session. But beyond these basics, there are deeper reasons related to both the candle’s design and your environment.
For instance, a wick that’s too small for the container’s diameter produces insufficient heat, causing the edges to stay solid while the center melts, leading to tunneling. Additionally, the type of wax can influence how it melts; some waxes are more prone to solidifying unevenly if not heated evenly. Environmental factors like drafts or temperature fluctuations can also disrupt the melting process, making it harder for the wax to burn uniformly. Even the shape of the container plays a role — narrow or deep jars can trap heat in the center, encouraging tunneling.
Understanding these factors is important because it highlights that proper burning isn’t just about following simple rules but also about selecting the right candle for your setup and environment. It underscores that some tunneling issues are systemic, requiring you to consider the candle’s design and placement, not just your burning habits. Recognizing these underlying causes helps you troubleshoot more effectively and choose candles that are less prone to tunneling from the outset.
How to Stop Tunneling Before It Starts
- Burn long enough the first time — at least 2 hours or until the wax pool reaches the edges. This creates an even melt surface that sets the stage for future burns. Skipping this step can cause the wax to solidify unevenly, making tunneling more likely in subsequent uses.
- Choose candles with the right wick size for your container — a wick too small won’t generate enough heat, leading to uneven melting. Investing in candles designed with appropriate wick-to-container ratios minimizes the risk of tunneling from the start.
- Keep your wicks trimmed to about ¼ inch. Long wicks can cause uneven burning, soot, or mushrooming, which interfere with a uniform melt. Proper wick maintenance ensures consistent heat distribution and reduces the chances of tunnel formation.
- Don’t rush the process. Each burn builds on the last, so patience pays off. Regularly burning the candle long enough to create a full melt pool prevents wax from solidifying in the center while edges remain untouched.
For example, if you notice the wax isn’t melting evenly after 15 minutes, extend the burn time to ensure the entire surface liquefies. If needed, gently warm the edges with a hairdryer or manually top off with melted wax to promote an even surface. These practices help set a healthy melting pattern, significantly reducing future tunneling risks.